WOOD:
Go to your local lumber yard and get yourself some pine boards. You don't need to spend the extra money on "clear" boards, but you can if you wish. Just make sure that the boards are the standard 1" thick (which is really 3/4"). The minimum width of your board should be 6".
PATTERN PIECES:
Top = 5 1/4 x 8"
Sides = 5 1/4 x 7 3/4" (remember to cut 2 of these)
Back = 5 1/4 x 8"
Front = 3 3/4 x 7 1/2"
Bottom = 3 3/4 x 4 3/4"
Diameter of entrance hole = 1 1/2", which is very important because anything larger will allow starlings to get into the box. The edge of the hole should be about one inch from the top of the frontpiece.
These plans are just generalizations, but they are the ones that I have used very successfully in my own yard for years.
ASSEMBLY:
First, attach the sides to the back. Next, attach the top to the back and sides. Then fit the bottom piece into place. Finally, attach the front.
When you assemble the box I would recommend using 1 1/2" drywall screws since this will make maintenance much easier. You won't need to predrill any holes for the screws if you don't want to, but a countersink bit will give the box a more finished look when you are done.
This pattern provides a roof with a little bit of an overhang, which will deter larger birds without impacting the bluebirds. If you want to extend the overhang a little more, cut the top to 5 1/4 x 9" and see how it looks.
The front of the box should be attached with two screws coming in from the sides at the top of the box. Predrill some holes in the side pieces so the threads of the screws don't get bound up in the wood. This will create a simple hinge that will allow the front of the box to swing up and out of the way for cleaning. The bottom of the frontpiece can be secured with a single screw that anchors into the bottom of the box, but this will require that you have a screwdriver with you to open the box. You can play around with other methods that do not require a screwdriver. You also want to remember to leave a bit of a gap (1/4 -1/2") at the top so you can accomodate the swinging of the door. This also has the happy coincidence of prioviding a little air flow in the box. To maximize airflow just cut the corners off the bottome of the box so it resemples an octagonal stop sign.
MOUNTING:
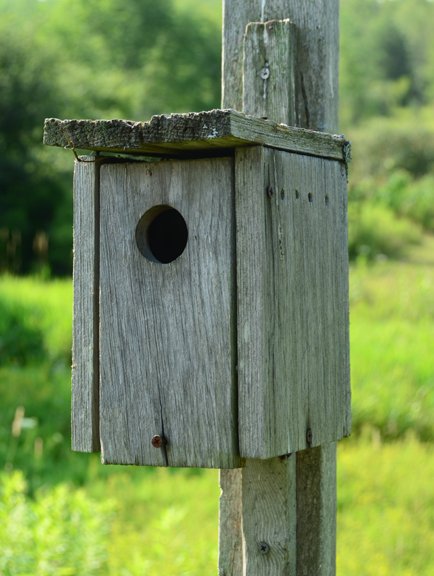
I recommend cutting an additional strip of wood that is 1x2x14". Screw this to the back of the box and you can then use this as a mounting rail (see photo above). Then you can purchase 2x4s to use as posts. You may also want to purchase a posthole digger, which will make installation much, much easier.
PLACEMENT:
Bluebirds like open areas like pastures, hayfields, and golf courses. More open areas may also attract the attention of tree swallows. Areas near trees may attract the attention of house wrens. Both of these species are quite happy to use "bluebird" boxes, so don't be surprised if they move in. To prevent competition it may be a good idea to put several boxes out so everyone gets a chance. Putting out the boxes in pairs (approximately 10' apart) will usualy keep bluebirds and tree swallows from fighting too much.
THE MOST IMPORTANT THING???
Make sure you put your boxes where you can see them and easily get to them. It if very important that you monitor the boxes and make sure that house sparrows don't move in (see the link to house sparrow control below). If your boxes are too "out of the way" for you to visit regularly, then they should be taken down.